Setting up a NixOS server on Netcup

NixOS can be used flawlessly on several servers from different providers. In this post I will go through the steps on how to spin up a NixOS Server at netcup.de. I tested it with their smallest virtual server instance which has the following characteristics:
- 1 CPU (Shared)
- 2GB of RAM
- 20GB of SSD
The servers are pretty fast and perform very well in terms of benchmarks. At the time of writing I am using 6 of those/similar instances (some the same configuration, for smaller side projects, some more powerful for databases and CI GitLab runners).
So, let’s get started! After the purchase process, you will get access to the Server Control Panel of Netcup. If you open up your virtual server control panel, it should look more or less like this:
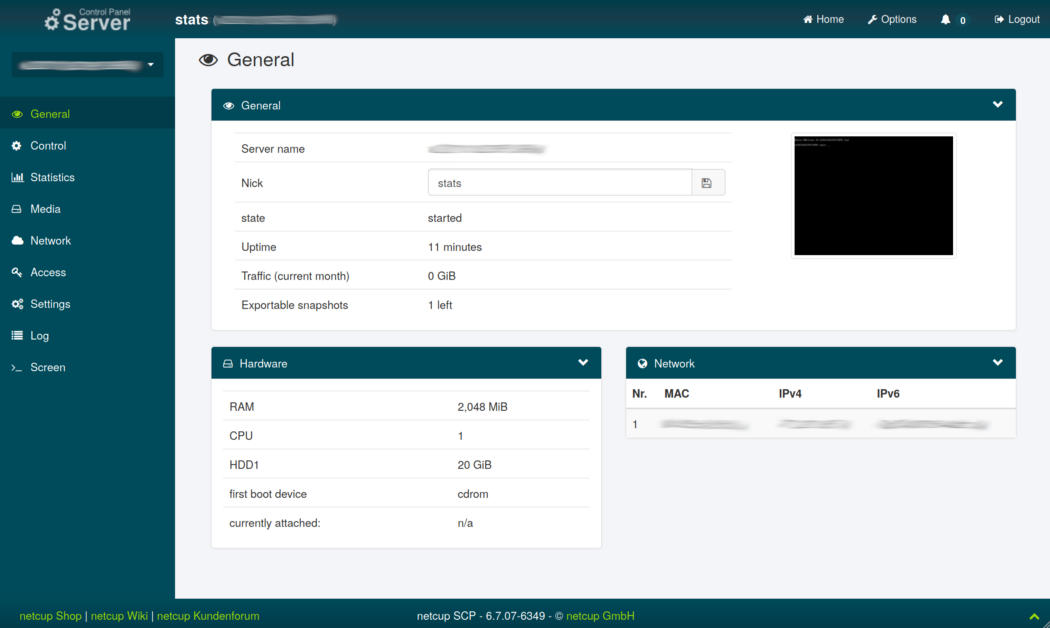
You will be provided with all basic information of your server. In my example I have named the server “stats”. As you can see, you have as well a console/terminal view in the top right corner, which you can as well open under the “screen” menu point in the main menu on the left.
Unfortunately we can not just choose a pre-installed image and restart the server. But we can upload own images and ISOs. So, let’s head to the media overview and select “DVD Drive” in the sub menu on the top right.
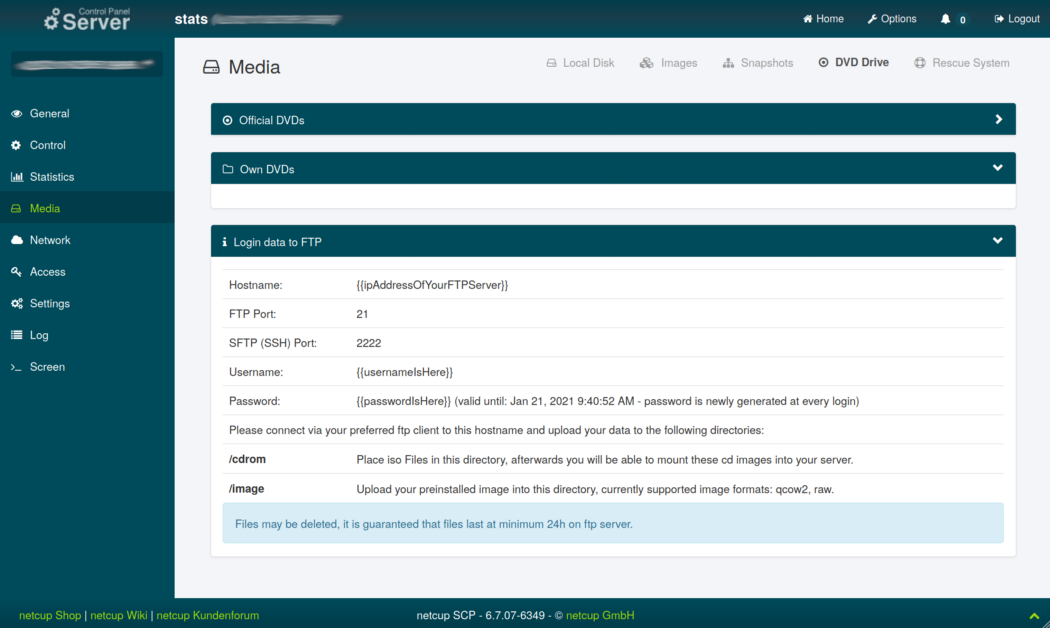
This view presents us three tabs. The first one with the official DVDs, which are supported by Netcup out of the box. And the second tab with own DVDs, which is for now empty.
The third tab “Login data to FTP” holds all information we need to upload a custom ISO (I usually use the NixOS minimal ISO, which is around 580MB and can be found at the nixos download page). After downloading the ISO we can use any FTP client to upload our ISO to to the “cdrom” folder (personally I use FileZilla) and attach the DVD. The result should look something like this:

Since the first boot device is the cdrom we can now restart the server (“Control” menu point on the right). After the restart we can head over to the “Screen” of our server, which will present us the default nixos terminal for installation:

We can now proceed with the default NixOS installation. I point the link to the correct place to start, since we have can skip some sections and go directly to the partitioning.
I recommend running cfdisk to remove all three existing partitions and write the partition table. Then continue with steps to create a MBR, nixos partition and some space for swapping. We will use 1MB for the MBR (to boot our server), roughly 16GB of space for nixos and 4GB of swapping (double of our RAM amount). Of course you can choose your own configuration.
parted /dev/sda -- mklabel msdos

parted /dev/sda -- mkpart primary 1MiB -4GiB

parted /dev/sda -- mkpart primary linux-swap -4GiB 100%
Afterwards we can continue with the installation as described in the installation guide (skipping the UEFI parts).
It is important to uncomment the boot.loader.grub.device option in the configuration.nix file. Usually it will already point to the correct place.As well, it can be useful to enable services.openssh.enable = true;
With all formatting and configuration done we can now restart the server (don’t forget to detach the DVD) and enjoy our new server.
Congratulations! You are running a NixOS Server on Netcup!
Thank you for reading this far! Let’s connect. You can @ me on X (@debilofant) with comments, or feel free to follow. Please like/share this article so that it reaches others as well.